Here’s how to fly through your package update chores using some handy tools.
Ah, the pain of combing through your package.json and comparing version
numbers in npmjs.org. This is a task that is relatively easy to automate.
The npm-check package
npm-check is a brilliant package which almost completely automates the process and provides a nice interface. Start by Installing it globally:
npm i -f npm-checkThen run it:
npm-check -usYou get a prompt showing you the outdated packages. Then press space to select a package to be updated, and hit enter to start the update process.
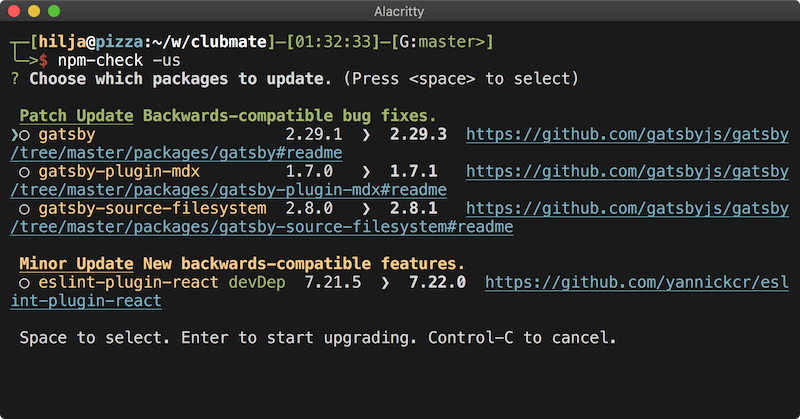
Here’s the explanations for the flags:
- -u
- Interactive update.
- -s
- Skip check for unused packages.
Running npm-check with legacy-peer-deps
You can’t pass npm-check any npm flags like --legacy-peer-deps which is a
bummer. But you can make an .npmrc file in your project’s root where you can
configure it legacy-peer-deps=true. Or you can configure npm globally
npm config set legacy-peer-deps true.
Option 2: npm-check-updates
The package npm-check-updates
does pretty much the same as npm-check, but with one extra step: the script
updates the package version numbers in your package.json, then you run
npm update manually.
Install globally:
$ npm i -g npm-check-updatescd into your project and run it:
$ npm-check-updatesThat’ll spew out a list of outdated packages for you to inspect. Then tell it to
update the packages.json file:
$ npm-check-updates -uWhen it’s done, use npm’s built-in update command:
$ npm updateConclusions
Using npm-check has worked very well for me. It has helped reduce my package update anxiety.